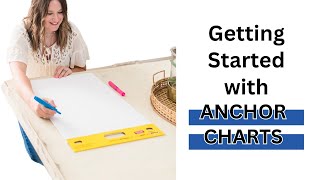
Anchor Chart On Main Idea: A Practical Guide for Teachers
When students struggle with identifying the main idea of a passage, an anchor chart can be the turning point. This visual tool turns abstract reading strategies into concrete, classroom‑ready references. Below you’ll discover how to design, display, and use an effective main idea anchor chart that keeps lessons engaging and boosts student confidence.
Why an Anchor Chart Works
Anchor charts serve as a shared visual memory aid. They help students:
- Recall key steps without flipping through textbooks.
- See the thinking process modeled by the teacher.
- Connect new strategies to familiar language.
By saying goodbye to boring worksheets and replacing them with a vibrant, reusable chart, you bring the power of visual learning directly onto the wall.
Essential Components of a Main Idea Anchor Chart
Every effective chart includes four core sections. Arrange them in a logical flow that matches the way you teach:
- Definition – A concise sentence that explains what a main idea is.
- Key Questions – Prompts such as “What is the author’s purpose?” and “What details support the central point?”
- Graphic Organizer – A simple diagram (e.g., “Topic Sentence + Supporting Details”) that students can copy.
- Examples – Short excerpts with the main idea highlighted and annotated.
Each section should be color‑coded or bordered to make navigation effortless.
Step‑by‑Step: Creating the Chart
Follow these steps to craft an anchor chart that aligns with your curriculum:
- Gather Materials: Use chart paper, markers, and sticky‑note tabs for future updates.
- Write a Clear Definition: “The main idea tells what the passage is mostly about.” Keep it short and bold.
- List Guiding Questions: Include at least three questions that prompt deep thinking. Example: “If I had to summarize this paragraph in one sentence, what would it be?”
- Design the Organizer: Draw a simple box labeled “Main Idea” with arrows pointing to supporting details. This visual cue helps visual learners.
- Show Real Examples: Choose a short paragraph from a grade‑appropriate text, underline the main idea, and label supporting details.
- Invite Student Input: Let a few students add sticky notes with their own examples. This reinforces ownership.
Once completed, hang the chart at eye level where every student can see it during reading activities.
Integrating the Chart into Daily Lessons
To maximize impact, embed the chart into routine practices:
- Mini‑Lesson Warm‑Ups: Begin each reading session by reviewing one part of the chart.
- Guided Practice: As you read a new text together, pause to reference the chart’s questions and organizer.
- Independent Work: Provide a worksheet that asks students to locate the chart, copy the organizer, and fill it in with their own findings.
- Exit Ticket: Ask students to write a one‑sentence summary and point to the chart