Automatic Spelling: A Quick Guide to Smart Typing
Automatic spelling, also known as autocorrect or spell‑check, is a built‑in feature that helps you catch typos and improve writing quality on the fly. Whether you’re drafting an email, composing a report in MS Word, or texting on Android, this tool can save time and reduce errors. In this article we’ll walk through how to enable, disable, and customize automatic spelling across common platforms, with a focus on the tips highlighted in the latest tutorial video.
What Is Automatic Spelling?
Automatic spelling is a software function that scans the words you type and compares them against a dictionary. When it detects a misspelling, it either suggests alternatives, automatically replaces the word, or highlights it for manual correction. This process can be configured to run in real time or after you finish typing a sentence.
Why You Should Use Automatic Spelling
- Accuracy – Reduces typographical errors that can confuse readers.
- Efficiency – Saves time by eliminating manual proofreading.
- Professionalism – Ensures documents look polished and credible.
- Accessibility – Helps users with dyslexia or language barriers.
How to Enable Automatic Spelling in Android
In Android, the autocorrect feature is part of the on‑screen keyboard settings. Below is a step‑by‑step guide, adapted from the video “How to enable autocorrect in Android.”
- Open Settings – Tap the gear icon from your home screen.
- Navigate to System > Languages & input – This section manages keyboard options.
- Select Virtual keyboard – Choose the keyboard you use (e.g., Gboard).
- Tap Text correction – Here you can toggle the autocorrect switch.
- Enable “Auto‑correct” – Toggle the switch to ON. You can also enable “Show suggestion strip” for quick word suggestions.
Once enabled, your Android keyboard will automatically replace common typos as you type. If you prefer manual correction, simply disable the auto‑correct toggle.
Turning On Automatic Spelling in MS Word
Microsoft Word offers a robust spell‑check engine that can be customized to suit different writing styles. Follow these steps to activate it:
- Open Word – Start a new document or open an existing one.
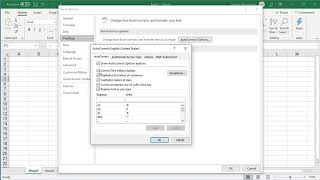
- Go to File > Options – This opens the Word Options dialog.
- Select Proofing – Here you’ll find spell‑check settings.
- Check “Check spelling as you type” – This ensures real‑time highlighting.