Cutting Exercises For Preschoolers: A Practical Guide for Parents and Teachers
Introducing scissors to preschoolers is a milestone that blends fine‑motor skill development with creative expression. A well‑structured cutting lesson not only builds confidence but also lays the foundation for later academic tasks. This article offers a step‑by‑step approach, safety reminders, and fun activities that can be used in the classroom or at home.
Why Cutting Matters in Early Childhood
Cutting with scissors is more than a craft skill; it strengthens hand‑eye coordination, promotes bilateral coordination, and encourages spatial awareness. When children learn to hold scissors correctly—thumbs facing the top of the blade and fingers gripping the handle—they develop a sense of control that translates to writing, buttoning, and other everyday tasks.
Getting Started: The First Lesson in the Art Room
Many teachers begin with a simple “first‑time” lesson. Arrange a low‑risk cutting area with a table or mat, and provide child‑sized scissors. Explain the basic safety rule: never point the blade at anyone or at yourself. Then, demonstrate the correct grip: thumbs on the top of the handle, index finger and middle finger on the other side. Keep the session short—five minutes of focused practice followed by a quick cleanup.
Step‑by‑Step Beginner Guide
- Show the Scissors: Hold a pair and name each part—blade, handle, and tip.
- Demonstrate the Grip: Place your thumb on the top of the handle and your fingers on the other side. Let the child mimic the motion with a toy or a paper towel.
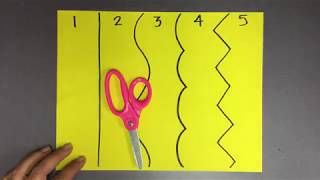
- Introduce Simple Shapes: Start with straight lines, then circles, and finally a zig‑zag. Use large, thick paper to reduce frustration.
- Encourage Repetition: Let the child practice cutting a line across a sheet, then a shape, and finally a simple picture from a coloring book.
- Give Positive Feedback: Praise effort, not perfection. This builds confidence and keeps the activity enjoyable.
Safety Tips for Parents and Teachers
- Supervise at all times. Even with the correct grip, children can accidentally slip.
- Use Child‑Size Scissors with rounded tips. The smaller blades reduce the risk of accidental cuts.
- Store Scissors Properly when not in use. Keep them in a child‑proof drawer or a lockable container.
- Teach “Stop” and “Drop” signals to reinforce safe handling.