Double Bubble Thinking Map Template: A Fun and Simple Guide
Ever felt like your brain needed a bubble bath? Double bubble thinking is the perfect way to soak up ideas, compare concepts, and splash creativity across the page. In this article we’ll walk you through everything you need to know about the Double Bubble Thinking Map Template, from its basic parts to a step‑by‑step tutorial on how to make one yourself.
What Is a Double Bubble Thinking Map?
A Double Bubble Thinking Map is a visual organizer that lets you place two central ideas side by side, then draw connections to similarities and differences. Think of it as a Venn diagram on steroids—each “bubble” represents a main concept, while the surrounding bubbles capture supporting details, examples, or counterpoints.
Educators love it for comparing historical events, scientists use it to contrast theories, and writers enjoy it for brainstorming character traits. The template is flexible, printable, and easy to adapt for any subject.
Key Parts of the Template
Before you start filling in your map, familiarize yourself with its building blocks:
- Central Bubbles: Two large circles placed side by side. Label each with the concept you’re comparing.
- Similarity Bubbles: Smaller circles that sit between the central bubbles, linked to both. Use these for shared features.
- Difference Bubbles: Smaller circles that attach to only one central bubble, highlighting unique aspects.
- Connecting Lines: Straight or curved lines that show relationships. Keep them tidy to maintain readability.
How to Create a Double Bubble Thinking Map Template
Ready to craft your own map? Follow these basic instructions. No fancy software required—just paper, a pencil, and a dash of imagination.
Step 1: Sketch the Framework
- Draw two large circles about 2 inches apart. These are your central bubbles.
- Between them, draw a row of three to five medium circles for similarities.
- On the outer sides of each central bubble, add three to five smaller circles for differences.
Step 2: Label the Central Ideas
Write the two main concepts you want to compare inside the central bubbles. Keep the wording short—one or two words work best.
Step 3: Populate Similarities and Differences
- Think of at least three points that both concepts share. Write each in a similarity bubble.
- Identify unique traits for each concept and place them in the appropriate difference bubbles.
- Use concise phrases; you can always expand later during discussion.
Step 4: Connect the Dots
Draw lines from each similarity bubble to both central bubbles, and from each difference bubble to its respective central bubble. This visual cue makes the map easy to scan.
Step 5: Refine and Color (Optional)
If you enjoy a splash of color, highlight similarities in one hue and differences in another. This step isn’t required, but it can help visual learners spot patterns faster.
Reimagining the Template with Digital Tools
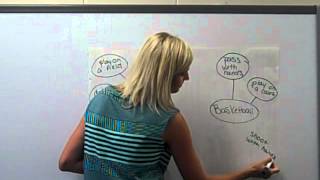
While hand‑drawing works great, many teachers and creators prefer a digital version for easy sharing. I created a short tutorial video using the YouTube Video Editor (http://www.youtube.com/editor) that demonstrates how to build a Double Bubble Thinking Map in a few clicks. The video walks you through selecting shapes, labeling bubbles, and exporting a printable PDF.
Watch this video to learn a simple, step‑by‑step process that you can replicate in PowerPoint, Google Slides, or any free drawing app. The visual guide also shows how to add animations, making the map a dynamic part of a presentation.
Practical Uses for Your Double Bubble Thinking Map
Once you have a template ready, the possibilities are endless. Here are a few ideas to get you started:
- Classroom Comparisons: Contrast renewable vs. non‑renewable energy sources.
- Literature Analysis: Compare protagonists from two different novels.
- Business Planning: Weigh the pros and cons of two marketing strategies.
- Personal Decision‑Making: Evaluate two career paths side by side.
Tips for Maximizing Effectiveness
To get the most out of your Double Bubble Thinking Map, keep these best practices in mind:
- Stay focused. Limit each bubble to one idea to avoid clutter.
- Use verbs. Action words (e.g., “influences,” “requires”) make relationships clearer.
- Review and revise. After the initial fill, step back and see if any points belong elsewhere.
- Invite collaboration. Let students or teammates add their own bubbles for a richer discussion.
Conclusion
The Double Bubble Thinking Map Template is a versatile, low‑tech tool that brings clarity to complex comparisons. Whether you draw it on a whiteboard, print a handout, or design a digital version, the core structure stays the same: two central ideas, linked by similarities and differences. By following the simple steps outlined above—and perhaps watching the accompanying video tutorial—you’ll be ready to reimagine any topic with a fresh, organized perspective.