Geometry Project: A Hands‑On Guide for Teachers and Students
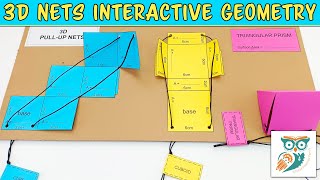
Designing a geometry project that captures curiosity while reinforcing core concepts can be challenging. This article outlines a step‑by‑step approach that blends historical insight, interactive 3‑D nets, and simple materials such as matchsticks. The result is a classroom experience that helps students explore area, volume, and spatial reasoning in a memorable way.
Why a Geometry Project Matters
Geometry is more than a set of formulas; it is the language of the world around us. From ancient Indian constructions to modern engineering, geometric ideas shape our daily lives. By turning abstract principles into tangible models, students can:
- Visualize the relationship between 2‑D shapes and their 3‑D counterparts.
- Develop problem‑solving skills through hands‑on manipulation.
- Connect historical inventions with contemporary design.
Historical Roots: Geometry in Ancient India
One of the world’s oldest geometrical inventions originates from India, where scholars such as Āryabhaṭa and later the mathematicians of the Kerala school explored circles, triangles, and the early concepts of calculus. Although many modern learners are unaware of this scientific heritage, acknowledging it provides a cultural context that enriches any geometry project.
Planning Your Geometry Project
Define Learning Objectives
Start by clarifying what students should master by the end of the project. Typical objectives include:
- Calculate area and surface area of common solids.
- Construct accurate 3‑D nets from flat patterns.
- Apply the Pythagorean theorem to real‑world problems.
Select Materials
For a cost‑effective and engaging project, gather the following items:
- Sturdy cardstock or foam sheets for nets.
- Matchsticks (or wooden dowels) for edges and frame building.
- Glue, scissors, and a ruler.
- Colored markers for labeling dimensions.
Demonstration: Building a Cube with Matchsticks
Step 1 – Draw the Net
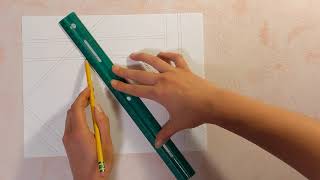
On a sheet of cardstock, sketch a cube net: six squares arranged in a “T” shape. Each square should be the same size, for example 5 cm × 5 cm. Label the edges A, B, and C to remind students of the dimensions they will measure later.
Step 2 – Cut and Fold
Use scissors to cut around the outer perimeter, leaving the internal edges untouched. Fold along every line to create crisp 90° angles. Reinforce each fold with a light crease to ensure the net holds its shape when assembled.
Step 3 – Assemble the Frame
Take matchsticks and glue them along the edges of the net. A simple technique is to apply a thin bead of glue to each matchstick end, press it onto the cardboard, and hold for 10 seconds. Continue until the entire skeleton of the cube