How To Enable Macros In Excel: A Step‑by‑Step Guide
Macros are powerful tools that automate repetitive tasks in Microsoft Excel. Whether you are a beginner learning to streamline data entry or an experienced analyst looking to boost productivity, knowing how to enable macros in Excel is essential. This article walks you through the process, explains security settings, and offers tips for safe macro use.
Why Enable Macros?
Excel macros are small programs written in Visual Basic for Applications (VBA) that can:
- Automate routine calculations.
- Generate reports with a single click.
- Integrate data from multiple worksheets.
- Save hours of manual work.
Because macros can run code on your computer, Excel disables them by default to protect you from potentially harmful scripts. Enabling macros only when you trust the source ensures you reap the benefits while maintaining security.
Step‑by‑Step: Enabling Macros in Excel
1. Open the Trust Center
Start by launching Excel and navigating to the Trust Center, where macro settings are controlled.
- Click File in the top‑left corner.
- Select Options at the bottom of the menu.
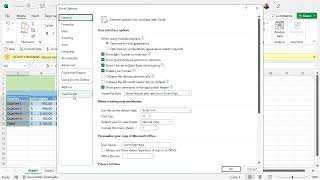
- In the Excel Options window, choose Trust Center from the left sidebar.
- Press the Trust Center Settings… button.
2. Choose Macro Settings
Within the Trust Center, click Macro Settings. You will see four options:
- Disable all macros without notification – safest, but blocks all macros.
- Disable all macros with notification – default setting; you can enable macros per file.
- Disable all macros except digitally signed macros – allows only macros from trusted publishers.
- Enable all macros (not recommended) – turns off protection; use only in a secure environment.
For most users, Disable all macros with notification offers a good balance of safety and convenience.
3. Enable Macros for a Specific Workbook
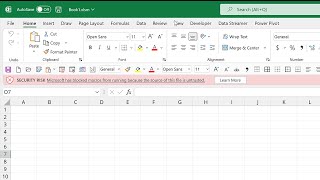
After setting the Trust Center, open the workbook that contains macros. If the workbook is from a trusted source, you will see a yellow security bar at the top of the sheet.
- Click the Enable Content button on the security bar.
- If the workbook is digitally signed, you may see an Enable Macros option instead.
Once enabled, the macros will run automatically according to the workbook’s design.
Best Practices for Safe Macro Use
Even after you learn how to enable macros in Excel, it’s important to follow security best practices:
- Only enable macros from trusted sources. If you receive a file via email, verify the sender before
![How To Enable Macros in Microsoft Excel [Tutorial]](https://i.ytimg.com/vi/joaC7QyRAPs/mqdefault.jpg)