How To Flush DNS: A Quick Tutorial
Today, you will learn how to flush DNS, a simple procedure that can help resolve various internet connectivity issues. This quick tutorial will guide you through the process, explaining what DNS is, why flushing it might be necessary, and how to do it on different operating systems.
What is DNS?
DNS, or Domain Name System, is a hierarchical and decentralized naming system for computers, services, or other resources connected to the internet or a private network. It translates domain names, which are easy for humans to remember, into IP addresses, which are used by computers to identify each other on a network.
Why Flush DNS?
Flushing DNS can be necessary when you're experiencing issues with your internet connection, such as being unable to access certain websites, or when you've made changes to your network settings and want to ensure that your device is using the correct DNS servers. It can also be useful if you're having trouble with a specific website, as flushing DNS can help clear any cached information that might be causing the problem.
What is IPconfig? How do you use it to flush DNS?
IPconfig is a command-line tool in Windows that is used to display and manage network interface settings. It can be used to flush DNS, which means clearing the DNS resolver cache. This can be helpful if you're experiencing issues with your internet connection or if you've made changes to your DNS settings.
To flush DNS using IPconfig, follow these steps:
- Open the Command Prompt. You can do this by typing "cmd" into the Windows search bar and selecting "Command Prompt" from the results.
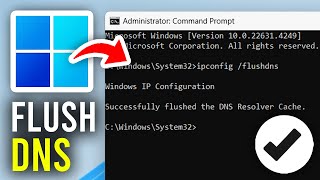
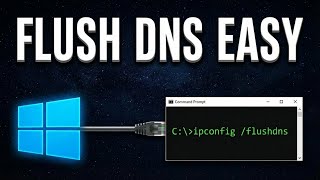
- Type "ipconfig /flushdns" and press Enter. This command will flush the DNS resolver cache.
- You should see a message that says "Successfully flushed the DNS Resolver Cache."
After flushing DNS, you may need to restart your browser or device for the changes to take effect.
How to Flush DNS on a Mac
If you're using a Mac, you can flush DNS using the Terminal. Here's how:
- Open the Terminal. You can do this by typing "Terminal" into the Spotlight search bar and selecting "Terminal" from the results.
- Type "sudo dscacheutil -flushcache" and press Enter. This command will flush the DNS cache.
- You may be prompted to enter your password. Type your password and press Enter.
- You should see a message that says "DSCacheUtil: Successfully flushed the cache."
After flushing DNS, you may need to restart your browser or device for the changes to take effect.
How to Flush DNS on a Linux System
If you're using a Linux system, you can flush DNS using the Terminal. The command you use will depend on the distribution of Linux you're using. Here are some common commands:
- For Ubuntu and Debian-based systems, you can use "sudo systemd-resolve --flush-caches".
- For Fedora, you can use "sudo systemctl restart NetworkManager".
- For Arch Linux, you can use "sudo systemctl restart systemd-resolved".
After flushing DNS, you may need to restart your browser or device for the changes to take effect.
Conclusion
Flushing DNS can be a quick and easy way to resolve various internet connectivity issues. Whether you're using a Windows PC, a Mac, or a Linux system, the process is relatively straightforward. Just remember to restart your browser or device after flushing DNS for the changes to take effect.