How To Make Checklist In Excel: A Step‑by‑Step Guide
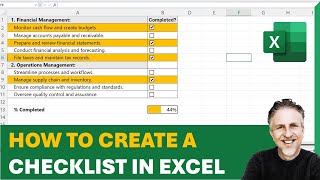
Excel isn’t just for numbers; it’s a powerful tool for creating dynamic checklists that keep you organized and on track. Whether you’re managing daily tasks, tracking project milestones, or monitoring personal goals, a well‑designed checklist in Excel can save time and reduce errors. In this tutorial you’ll learn how to build a functional checklist from scratch, add interactive checkboxes, and apply conditional formatting to highlight completed items.
Why Choose Excel for Your Checklist?
Flexibility. Excel lets you customize columns, add formulas, and expand the list as your needs grow.
Visibility. With built‑in sorting and filtering, you can quickly see what’s pending and what’s done.
Collaboration. Share the workbook with teammates and watch updates happen in real time.
What You’ll Need
- Microsoft Excel 2016 or later (or a compatible online version)
- A basic understanding of cells, rows, and columns
- Optional: a short video tutorial – “In this video, we’ll be showing you how to set up the checklist step by step.”
Step 1: Set Up the Worksheet Layout
- Open a new workbook and rename the first sheet to Checklist.
- In row 1, create headers such as Task, Owner, Due Date, Status, and Notes.
- Adjust column widths so the text fits comfortably. A good rule of thumb is to keep the Task column wider than the others.
Step 2: Insert Interactive Checkboxes
Excel’s Form Controls make it easy to add clickable boxes that automatically update the Status column.
- Go to the Developer tab. If it’s hidden, enable it via File → Options → Customize Ribbon and check Developer.
- Click Insert → Form Controls → Check Box (Form Control).
- Place the first checkbox in the cell under the Status column (e.g., D2).
- Right‑click the checkbox, choose Format Control, and set the Cell link to the same cell (D2). The cell will now display TRUE when checked and FALSE when unchecked.
- Copy the checkbox down the column to cover all tasks.
Step 3: Add Conditional Formatting for Visual Feedback
Highlight completed tasks automatically so you can scan the list at a glance.
- Select the range that contains your tasks (e.g., A2:A100).
- Choose Home → Conditional Formatting → New Rule.
- Select “Use a formula to determine which cells to format” and enter the formula =$D2=TRUE.
- Pick a formatting style—such as a light green fill and strikethrough font—to indicate completion.
- Click OK. All rows with a checked box will now adopt the chosen style.
Step 4: Automate Status Text (Optional)
If you prefer to see the words “Done” or “Pending” instead of TRUE/FALSE, add a helper column.
- Insert a new column titled Result next to Status.
- In cell E2, type the formula =IF(D2, "Done", "Pending") and drag it down.
- Apply the same conditional formatting to the Result column if you want color cues.
Step 5: Protect Your Checklist (Optional)
To prevent accidental changes to formulas or formatting:
- Select the cells you want users to edit (usually the Task and Notes columns).
- Right‑click, choose Format Cells → Protection**, and uncheck **Locked**.
- Then go to Review → Protect Sheet, set a password, and enable only the actions you want to allow (e.g., “Select unlocked cells”).
Tips for Maintaining a Clean Checklist
- Sort regularly. Use the filter arrows on the header row to sort by Due Date or Status.
- Archive completed items. Move rows marked “Done” to a separate sheet to keep the active list short.
- Link to external resources. Paste URLs in the Notes column for quick reference.
- Review weekly. Set a recurring reminder to update the checklist and adjust priorities.
Take Your Skills Further
Want to stay organized with your tasks, projects, or goals? In this step‑by‑step tutorial, you’ll learn how to create professional‑grade checklists that adapt to any workflow. If you found this guide helpful, consider exploring more advanced Excel tricks in our video series and online courses.
Join 500,000+ professionals in our courses here https://link.xelplus.com/yt-d-all-courses. 400,000+ professionals trust our courses—start your journey here https://link.xelplus.com/yt-d-all-courses. Quickly learn how to streamline your daily planning, automate status updates, and collaborate seamlessly.
If you have found this content useful and want to show your appreciation, please use this link to buy me a beer https://www.buymeacoffee.com/yourprofile.
Conclusion
Creating a checklist in Excel is straightforward, yet the tool’s flexibility lets you expand the basic list into a robust task‑management system. By adding checkboxes, conditional formatting, and optional automation, you’ll have a visual, interactive checklist that keeps you focused and productive. Start building yours today, and watch how a simple spreadsheet can transform the way you manage work and life.


![How to Create a Checklist in Excel | How to Create a To-Do List in Excel [GUIDE]](https://i.ytimg.com/vi/vNGpGEuWXYg/mqdefault.jpg)