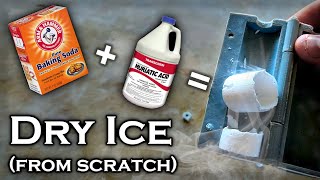
How To Make Dry Ice: A Step‑by‑Step Guide
Dry ice (solid carbon dioxide) is a versatile tool for everything from theatrical fog to food preservation. If you’ve ever wondered how to make dry‑ice at home, this article breaks down the process in clear, safe steps. In this video, I’m going to show you the exact method I use, and the same technique is explained in detail below.
Why Dry Ice Is Useful
When carbon dioxide freezes at –78.5 °C (–109.3 °F) it turns into a solid that sublimates directly into gas. This rapid transition creates a cold, dry environment without any liquid residue. Some common uses include:
- Creating low‑fog effects for parties or stage productions.
- Keeping perishable foods cold during transport.
- Cleaning surfaces with “dry‑ice blasting” – a mess‑free alternative to sand blasting.
Safety First: Precautions You Must Take
Dry ice is extremely cold and can cause frostbite or burns if handled improperly. Follow these safety rules before you start:
- Wear protective gloves. Insulated, waterproof gloves keep your skin from direct contact.
- Use eye protection. Goggles prevent accidental splashes of carbon dioxide gas.
- Work in a well‑ventilated area. Carbon dioxide displaces oxygen; good airflow avoids asphyxiation.
- Never seal dry ice in a container. The gas will build pressure and could cause an explosion.
Materials Needed
Gather the following items before you begin. All are readily available at hardware or grocery stores.
- Liquid carbon dioxide (CO₂) source – commonly sold in small cylinders for beverage dispensing.
- Heavy‑duty metal or stainless‑steel container with a tight‑fitting lid.
- Insulated gloves and safety goggles.