How To Print Screen On Windows Hotkey: A Complete Guide
Whether you need to capture a quick screenshot for a work presentation, a tutorial video, or just to share a funny moment with friends, knowing the right Print Screen hotkey on Windows can save you time. In this article we walk through the built‑in methods, the new tools in Windows 11, and a few third‑party tricks that let you take a screenshot in just a few keystrokes.
Understanding the Classic Print Screen Key
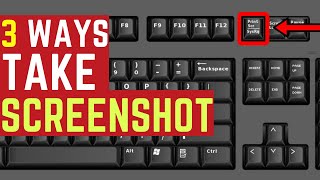
The original Print Screen key (often labeled PrtScn on keyboards) has been part of Windows since the earliest versions of the operating system. When you press it, Windows copies the entire screen to the clipboard. From there you can paste the image into Paint, Word, an email, or any other program that accepts images.
- PrtScn alone – captures the whole screen.
- Alt + PrtScn – captures only the active window.
- Windows + Shift + S – opens the Snipping Tool for a custom region.
These shortcuts work on Windows 10, Windows 11, and most earlier versions. However, the way the image is stored can differ: the classic PrtScn places the capture on the clipboard, while the newer Windows + Shift + S saves the selection to the clipboard and also shows a notification that lets you open the Snipping Tool directly.
Enabling the Print Screen Shortcut in Windows 11
In Windows 11 the Snipping Tool is the recommended utility for quick screenshots. If you prefer the traditional behavior—where pressing Print Screen automatically saves a file—Windows offers an easy toggle:
- Open Settings (Windows + I).
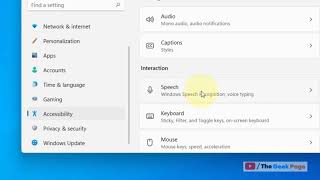
- Navigate to Accessibility → Keyboard.
- Find the “Use the Print Screen button to open screen snipping” option and turn it On.
Once enabled, pressing PrtScn launches the Snipping Tool, and the first screenshot you take is saved automatically to the Pictures\Screenshots folder. This behavior mirrors the legacy “Save screenshot as a file” feature that many users expect.
Step‑by‑Step Demo: Capture a Screen Region
In the accompanying video, I show you how you can capture a specific area of the screen without opening any extra apps:
- Press Windows + Shift + S. A translucent overlay appears.
- Choose one of the four icons at the top: rectangular snip, freeform snip, window snip, or full‑screen snip.
- Drag the cursor to select the region you want. Release the mouse button.
- The captured image is copied to the clipboard, and a small notification pops up. Click the notification to edit or save the screenshot in the Snipping Tool.
This method works on any Windows version that includes the Snipping Tool (Windows