How to Private an X (Twitter) Account: A Step‑by‑Step Guide
If you’re looking for more privacy on X, this guide shows how to make your account private in just a few minutes. By switching your profile to “protected,” only approved followers can see your tweets, replies, and media. Below you’ll find clear instructions, useful tips, and answers to common questions, all based on the latest platform settings.
Why Make Your X Account Private?
Privacy is a top concern for many users. A private account helps you:
- Control who sees your content – Only people you approve can read your tweets.
- Prevent unwanted data collection – Protected tweets are not indexed by public search engines.
- Reduce spam and harassment – Unapproved accounts cannot mention or reply to you publicly.
These benefits make a protected profile a sensible choice for personal accounts, professional use, or anyone who values discretion online.
Step‑by‑Step: How to Make Your X Account Private
- Open the X app or website and log in to your account.
- Navigate to Settings:
- On mobile, tap the profile icon, then the gear icon labeled “Settings and privacy.”
- On desktop, click “More” (three dots) in the left sidebar, then select “Settings and privacy.”
- Find the “Privacy and safety” section. This area contains all the controls related to who can see and interact with your content.
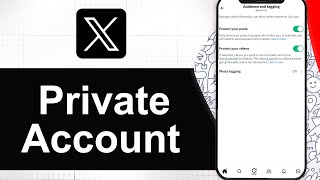
- Enable “Protect your Tweets”. Toggle the switch to the on position. A confirmation message will appear, explaining that your tweets will become private.
- Save changes. Most platforms apply the setting automatically, but it’s good practice to verify that the toggle remains on after you exit the menu.
Once you’ve completed these steps, your X account is private. New followers will need to send a request that you can approve or deny. Existing followers will retain access unless you remove them manually.
Managing Followers After You Go Private
Going private changes how you interact with your audience. Here are some best practices for handling follower requests:
- Review requests regularly – Check the “Follow requests” tab daily to avoid missing legitimate connections.
- Use the “Block” feature for accounts you never want to see your tweets, even if they request to follow you.
- Curate a list of trusted followers to keep your timeline focused and safe.
Additional Privacy Settings to Consider
Protecting your tweets is just one part of a comprehensive privacy strategy. Below are other settings you can adjust for maximum control:
- Location sharing