How To Screen Record On Windows: A Step‑by‑Step Guide
Whether you need to capture a tutorial, preserve a gaming highlight, or document a software bug, screen recording on Windows is easier than you might think. Did you know that you already have a built‑in tool for capturing video without installing any third‑party software? In this article we’ll walk you through the free, native options, share tips for higher‑quality output, and answer common questions so you can start recording in minutes.
Why Use Windows’ Built‑In Recorder?
Looking for a free solution that doesn’t require a download? Windows provides several native utilities that are FREE and no download required to use this feature. These tools are integrated with the operating system, meaning they receive regular updates, work seamlessly with hardware acceleration, and respect your privacy settings.
Option 1: Xbox Game Bar (Windows 10 & 11)
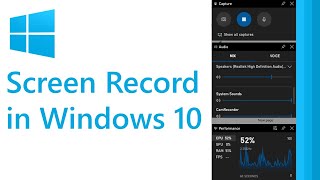
The Xbox Game Bar is the most popular built‑in screen recorder. It was originally designed for gamers, but it works equally well for any on‑screen activity.
Learn how to enable and use the Game Bar
- Open Settings → Gaming → Xbox Game Bar and toggle the switch to On.
- Press Win + G to launch the overlay.
- Click the Capture widget (camera icon) or press Win + Alt + R to start recording.
- To record audio from your microphone, click the microphone icon before you begin.
- When you’re finished, press Win + Alt + R again or use the stop button in the overlay. The video is saved automatically to Videos\Captures.
This method is FREE and no download required to use this tool, and it supports up to 1080p at 60 fps on most modern PCs.
Option 2: PowerPoint (Windows 10/11)
Many users overlook PowerPoint as a screen‑recording solution, but it’s built into Microsoft Office and works well for short clips.
Learn how to record with PowerPoint
- Open PowerPoint and create a new blank presentation.
- Go to the Insert tab and select Screen Recording.
- Choose the area of the screen you want to capture