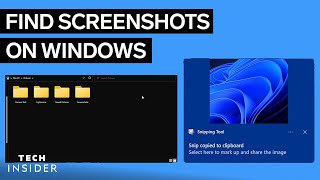
How To Screenshot In Desktop Windows 11: A Complete Guide
Whether you need to capture your whole screen — or just a portion of it — Windows 11 offers a variety of built‑in tools that make the process quick and reliable. In this article we’ll walk through the most common methods, highlight shortcuts for power users, and share a few tips to help you get the perfect shot every time.
Why Knowing Multiple Screenshot Methods Matters
Different tasks call for different capture styles. A full‑screen image is ideal for documenting a system error, while a selective region works best for tutorials or sharing a specific part of a document. By mastering the three primary ways to take a screenshot in Windows 11, you’ll be ready for any situation without needing third‑party software.
Method 1: Keyboard Shortcuts for Instant Shots
The quickest way to capture your screen is with built‑in keyboard shortcuts. These require no additional apps and work on virtually any Windows 11 device.
- Print Screen (PrtScn) – Press PrtScn to copy the entire desktop to the clipboard. Open Paint or another image editor and press Ctrl + V to paste.
- Windows + Print Screen – This combination saves a full‑screen PNG automatically to Pictures → Screenshots while also copying it to the clipboard.
- Alt + Print Screen – Captures only the active window, useful when you don’t want the surrounding desktop clutter.
- Windows + Shift + S – Opens the Snipping Tool overlay, letting you choose a rectangular, free‑form, window, or full‑screen snip. The image is placed on the clipboard for immediate pasting.
These shortcuts are reliable in any desktop environment, even when remote‑desktop sessions are active.
Method 2: Using the Snipping Tool
The Snipping Tool has been refreshed for Windows 11 and now combines classic snipping with new editing features.
- Open the Snipping Tool by typing “Snipping Tool” in the Start menu and selecting the app.
- Click New and choose one of four modes:
- Rectangular Snip – Drag to capture a box.
- Freeform Snip – Draw an irregular shape.
- Window Snip – Click a window to capture it.
- Full‑screen Snip – Capture the entire display.
- After you make a selection, the image opens in the Snipping Tool editor where you can annotate, crop, or highlight.
- Save the file using File → Save As or press Ctrl + S. By default, screenshots are stored in Pictures → Screenshots, but you can choose any folder.
The Snipping