How To Screenshot In Microsoft Excel
Excel is a powerful tool for data analysis, but sometimes you need to capture a snapshot of a worksheet to share with colleagues, document a step in a tutorial, or preserve a particular view. Learning how to quickly and easily take screenshots in Microsoft Excel can save you time and make collaboration smoother. Below, we walk through the most common methods, provide step‑by‑step instructions, and share useful tips to ensure your screenshots look clear and professional.
Why Take Screenshots in Excel?
- Documentation – Capture the state of a workbook before and after a change.
- Teaching – Show students or team members specific formulas or formatting.
- Reporting – Include visual evidence in presentations or reports.
- Problem Solving – Send a screenshot to support or forums to describe an issue.
Because Excel often contains large tables or complex charts, a screenshot can be more effective than copying data into a separate document.
Method 1: Using the Built‑in “Print Screen” Key
This method works on any Windows PC and is the quickest way to capture the entire screen or a selected area.
- Open the Excel workbook and navigate to the sheet you want to capture.
- Press PrtScn (Print Screen) to copy the entire screen to the clipboard.
- Open a program that can paste images, such as Microsoft Word, PowerPoint, or Paint.
- Paste the screenshot with Ctrl+V.
- Crop or edit the image as needed, then save or insert it into your document.
For a more focused capture, press Alt+PrtScn to capture only the active window. The screenshot will be copied to the clipboard and can be pasted directly into Excel or another application.
Method 2: Using the Snipping Tool (Windows 10/11)
The Snipping Tool offers greater flexibility, allowing you to select a rectangular, free‑form, window, or full‑screen snip.
- Search for “Snipping Tool” in the Start menu and launch the app.
- Click New and choose the desired snip type.
- Drag the cursor to select the area of the worksheet you want to capture.
- Once the snip is taken, it appears in the Snipping Tool window.
- Use the toolbar to annotate, highlight, or save the image.
- Copy the snip to the clipboard or save it as a PNG or JPEG file for later use.
Because the Snipping Tool saves images in a format that preserves clarity, it’s ideal for screenshots that will be shared in presentations.
Method 3: Using the “Screenshot” Feature in Excel (Office 365 & Excel 2019+)
Excel itself includes a built‑in screenshot tool that captures the current worksheet or a selected area without leaving the application.
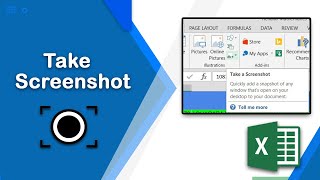
- Navigate to the Insert tab on the Ribbon.
- Click Screenshot in the Illustrations group.
- Choose Screen


![How To Take Screenshot In Microsoft Excel? [2025 Guide]](https://i.ytimg.com/vi/DcZdzb9CMCI/mqdefault.jpg)


![How To Take A Screenshot In Excel [2026 Guide]](https://i.ytimg.com/vi/QOHiZ6LzWS8/mqdefault.jpg)


![How To Take Screenshot In Microsoft Excel [2026 Guide]](https://i.ytimg.com/vi/PS4VnwAKfU8/mqdefault.jpg)

