How To Screenshot In Windows Fast: Quick Methods for Every User
Capturing a screenshot on a Windows PC doesn’t have to be a slow, confusing process. Whether you need a single window, a custom‑shaped region, or a full‑screen video game shot, Windows offers built‑in tools that let you grab images in seconds. Below are four easy ways to take screenshots fast, each with step‑by‑step instructions and tips for getting the best results.
1. Use Keyboard Shortcuts for Instant Full‑Screen Shots
The fastest method is a simple key press. Windows recognizes two primary shortcuts:
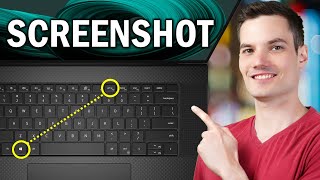
- Print Screen (PrtScn) – Press once to copy the entire screen to the clipboard. Open any image editor (such as Paint) and press Ctrl + V to paste, then save the file.
- Windows + Print Screen – Press both keys together to save a full‑screen capture automatically to Pictures → Screenshots. You’ll hear a brief shutter sound, confirming the image was saved.
These shortcuts work in any app, from browsers to games, making them ideal for quick documentation or sharing.
2. Capture Custom Areas with Snip & Sketch
For more control over the captured region, Windows 10 and 11 include the Snip & Sketch tool. It combines the classic Snipping Tool’s flexibility with modern editing features.
- Press Windows + Shift + S. The screen dims and a small toolbar appears at the top.
- Select the shape you need: rectangular, free‑form, window, or full screen.
- Drag to define the area. The screenshot is copied to the clipboard and a notification pops up.
- Click the notification to open Snip & Sketch, where you can annotate, crop, or save the image.
Snip & Sketch also offers a Delay option (3 seconds or 10 seconds), useful for capturing dropdown menus or pop‑ups that disappear quickly.
3. Record Gameplay and High‑Performance Screens with Xbox Game Bar
If you need a screenshot while playing a game or using a graphics‑intensive application, the Xbox Game Bar provides a seamless solution.
- Open the game or app, then press Windows + G to launch the Game Bar overlay.
- Click the camera icon or press Windows + Alt + PrtScn to capture the current frame.
- The screenshot is saved to Videos → Captures by default, but you can change the folder in Game Bar settings.
Beyond static images, the Game Bar