How to Screenshot One Monitor on a Windows PC
Many Windows users run a multi‑monitor setup for work, gaming, or creative projects. While the default Win+PrtScr shortcut captures every screen at once, there are several reliable ways to grab an image of just a single monitor. This guide walks you through built‑in Windows tools, handy keyboard shortcuts, and a few third‑party utilities, giving you a clear step‑by‑step process for each method.
Why Capture a Single Monitor?
Capturing only one monitor can be useful in many scenarios:
- Presentations – Show a specific application without exposing other windows.
- Technical support – Send a screenshot of the problematic screen only.
- Content creation – Keep the image file size small and avoid unnecessary background clutter.
- Gaming – Share a high‑resolution shot from the monitor you’re playing on while keeping chat or other monitors private.
Built‑In Windows Methods
Windows includes several native options that let you isolate a single monitor without installing extra software.
1. Win+Shift+S (Snip & Sketch)The quickest way to capture a specific area or window is the Win+Shift+S shortcut. It opens the Snip & Sketch overlay with four modes: rectangular, free‑form, window, and full‑screen.
- Press Win+Shift+S. The screen dims and a small toolbar appears at the top.
- Select the Window icon (looks like a rectangle with a cursor).
- Click on the monitor you want to capture. The entire monitor is copied to the clipboard.
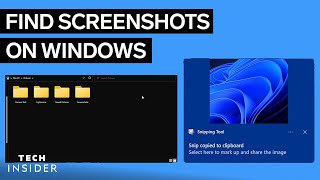
- A notification pops up; click it to open the image in Snip & Sketch for annotation or saving.
This method works on any Windows 10 or Windows 11 system and does not require you to crop the image later.
2. Snipping Tool (Windows 11) / Snip & Sketch (Windows 10)Both tools let you choose the Window mode, which captures the active monitor automatically.
- Open Snipping Tool (search “Snipping Tool” in the Start menu).
- Click New and select Window snip from the dropdown.
- Hover over the monitor you want, then click once. The tool captures that monitor and opens it for editing.
- Save the file using File → Save As.
If you prefer the classic PrtScr key, you can still isolate a single monitor by cropping the image afterward.
- Press PrtScr. The entire desktop (all monitors) is copied to the clipboard.
- Open Paint, Paint 3D, or any image editor.
- Paste with Ctrl+V.
- Use the Select tool to draw a rectangle around the monitor you need, then click Crop.
- Save the cropped image.
While this adds an extra step, it works on every Windows version and requires no additional software.
Third‑Party Utilities for One‑Monitor Screenshots
If you frequently need single‑monitor captures, a dedicated screenshot program can speed up the workflow.
- Greenshot – Free, open‑source, and lets you assign a hotkey to capture the active monitor only.
- Lightshot – Lightweight, with an intuitive selection box that snaps to the edges of a monitor.
- Snagit – Paid solution offering advanced editing, scrolling capture, and a built‑in “Capture Region” that can be set to a specific monitor.
All three tools allow you to define a custom shortcut (e.g., Ctrl+Alt+1) that directly saves the screenshot to a folder of your choice, bypassing the clipboard entirely.
Step‑by‑Step Guide for the Most Common Scenarios
Scenario A: Quick One‑Click Capture (Win+Shift+S)This is ideal when you need a fast shot without opening any extra windows.
- Press Win+Shift+S.
- Choose the Window mode.
- Click the monitor you want.
- When the notification appears, click it to open the edit window.
- Save with Ctrl+S or use the toolbar to copy to clipboard.
Set up a custom shortcut if you prefer the classic Snipping Tool interface.
- Right‑click the Snipping Tool shortcut on the desktop and select Properties.
- In the Shortcut key field, press a combination like Ctrl+Alt+S.
- Apply and close.
- Press your new shortcut, choose Window snip, and click the desired monitor.
Greenshot can be configured to save each monitor capture automatically.
- Download and install Greenshot.
- Open Preferences → Capture and enable “Capture active monitor only.”
- Assign a hotkey (e.g., Ctrl+Alt+M).
- Press the hotkey; Greenshot saves the image to the default folder without further interaction.
Tips for Cleaner Screenshots
- Hide the taskbar on the monitor you’re capturing: right‑click the taskbar, select “Taskbar settings,” and turn on “Automatically hide the taskbar in desktop mode.”
- Turn off notifications temporarily (focus assist) to avoid pop‑ups appearing in the shot.
- Use Display scaling of 100 % for the most accurate pixel representation, especially when editing later.
- If you need a specific resolution, set the monitor to that resolution before capturing.
Common Issues & Troubleshooting
Problem: The screenshot includes all monitors even when using Win+Shift+S.
Solution: Make sure you selected the Window mode, not the rectangular or full‑screen mode. The window mode captures the entire monitor that contains the active window.
Problem: The Snipping Tool won’t recognize a monitor as a separate window.
Solution: Ensure the monitor is set as an “extended” display (Settings → System → Display). Duplicate or “show only on 1” modes treat both screens as one logical display.
Problem: Cropped images are blurry.
Solution: Capture at the monitor’s native resolution and avoid scaling the image in the editor. Save as PNG for lossless quality.
Conclusion
Capturing a screenshot of a single monitor on a Windows PC is straightforward once you know the right tool. The built‑in Win+Shift+S shortcut offers a fast, no‑install solution, while the Snipping Tool and classic Print Screen method provide reliable backups. For power users, third‑party utilities like Greenshot or Snagit add automation and extra editing features. By following the steps outlined above and applying the tips for cleaner images, you’ll be able to produce exactly the screenshot you need—whether it’s for a support ticket, a tutorial video, or a social‑media post.