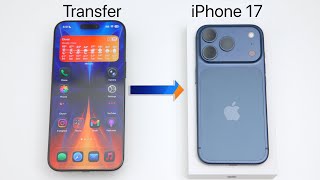
How To Transfer Data From iPhone To iPhone: A Step‑by‑Step Guide
Upgrading to a new iPhone is exciting, but moving your photos, messages, apps, and settings can feel daunting. Fortunately, Apple provides several built‑in options, and third‑party tools like Tenorshare iCareFone make the process even smoother. Below you’ll find three reliable ways to migrate your data, plus tips to keep everything synced after the move.
Why a Smooth Transfer Matters
When you switch devices, you want every conversation, photo, and app to appear exactly as it was on your old iPhone. A clean transfer:
- Preserves personal memories stored in the Photos app.
- Keeps your message history intact, avoiding the need to start fresh.
- Ensures all app data and login credentials remain functional.
- Reduces the time spent re‑installing and configuring apps.
Staying current on emerging tech can also help you discover new features that simplify the migration process. For the latest updates, visit https://clickhubspot.com/an7t.
Method 1: Quick Start (Direct Device‑to‑Device Transfer)
The Quick Start feature uses Bluetooth and Wi‑Fi to copy everything from your old iPhone to the new one. This is the fastest method when both devices run iOS 12.4 or later.
Steps to Use Quick Start
- Turn on your new iPhone and place it near your current iPhone.
- A Quick Start screen appears on the old device. Tap Continue to begin.
- When prompted, use your Apple ID to sign in on the new iPhone.
- Choose whether to transfer data wirelessly or via a cable connection (the cable method can be faster for large libraries).
- Keep both phones close until the progress bar finishes. Your new iPhone will restart and finish setting up.
After the transfer, verify that all apps, photos, and settings appear correctly. If anything is missing, you can run a second pass or use one of the backup methods described below.
Method 2: iCloud Backup and Restore
If you prefer a cloud‑based approach, iCloud offers a reliable


![[2 Ways] How to Transfer Data from iPhone to iPhone - 2026](https://i.ytimg.com/vi/VshIJOT7bl4/mqdefault.jpg)