Label Parts Of A Wave: A Complete Guide for GCSE Physics
Waves are everywhere – from the ripples on a pond to the radio signals that bring music into your ears. Understanding how to label the parts of a wave is a foundational skill in physics, and it helps you see why waves can transfer energy without moving matter. This article walks you through the essential wave features, shows how to label them quickly, and explains their function in both transverse and longitudinal contexts.
Why Learn Wave Labels?
When you can correctly identify each part of a wave, you can:
- Analyse reflection, refraction and diffraction with confidence.
- Predict how changes in one part (for example, amplitude) affect the energy carried by the wave.
- Communicate clearly in lab reports, exams and scientific discussions.
In a typical GCSE lesson, teachers often say, “We quickly go over 4 key labels” – the crest, trough, wavelength and amplitude. Mastering these four will give you a solid base for more advanced topics.
Four Core Labels – Learn How to QUICKLY Identify Them
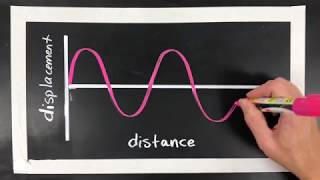
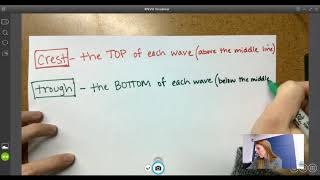
- Crest – the highest point of a transverse wave, where the medium is displaced furthest above the equilibrium line.
- Trough – the lowest point, the mirror image of the crest, displaced furthest below the equilibrium line.
- Amplitude – the distance from the equilibrium line to either the crest or trough. It represents the maximum displacement of the medium and is directly related to the wave’s energy.
- Wavelength (λ) – the distance between two consecutive points that are in phase, such as crest‑to‑crest or trough‑to‑trough.
These four labels appear on both transverse and longitudinal diagrams, although the visual representation differs. In a longitudinal wave, the analogous points are called compressions and rarefactions, but the concepts of amplitude and wavelength remain the same.
Additional Labels Worth Knowing
Beyond the core four, a more detailed diagram may include:
- Frequency (f) – the number of complete cycles that pass a fixed point each second, measured in hertz (Hz). Frequency and wavelength are linked by the wave speed equation v = f λ.
- Period (T) – the time for one full cycle, the reciprocal of frequency (T = 1/f).
- Equilibrium Position – the line about which the medium oscillates; it represents the undisturbed state of the medium.
- Phase – a description of where a point on the wave is within its cycle, often expressed in degrees or radians.
Transverse vs. Longitudinal Waves: A Quick Comparison
Both types of waves share the same fundamental labels, but the direction of particle motion differs:
Transverse Longitudinal Particle Motion Perpendicular to the direction of travel (up‑and‑down) Parallel to the direction of travel (back‑and‑forth) Key Visual Labels Crest, trough, amplitude Compression, rarefaction, amplitude Common Examples Light, water surface waves, waves on a string Sound, seismic P‑wavesThe Function of Waves: Energy Transfer Without Matter
One of the most important concepts in physics is that waves transfer energy but do not transfer matter. When a wave propagates, each particle of the medium only moves a short distance from its equilibrium position; the disturbance travels onward, carrying energy.
For example, when you shout across a room, the air particles vibrate back and forth (a longitudinal wave). The sound energy moves from your mouth to your friend’s ear, yet the air itself stays in roughly the same place. The same principle applies to light waves, which move through the vacuum of space without needing a material medium.
How to Label a Wave Diagram in an Exam
Exams often ask you to label a diagram. Follow these steps to ensure you cover everything efficiently:
- Identify the wave type (transverse or longitudinal). This tells you whether to look for crests/troughs or compressions/rarefactions.
- Locate the equilibrium line – it’s the baseline for measuring amplitude.
- Mark the highest point (crest) and the lowest point (trough). Write “Crest” and “Trough” directly on the diagram.
- Draw a double‑arrow spanning one full cycle and label it “λ (wavelength)”.
- From the equilibrium line to the crest (or trough) draw a single arrow and label it “A (amplitude)”.
- If space permits, add “f (frequency)” and “T (period)” near the wave, noting that f = 1/T.
Practising this routine will help you learn how to QUICKLY label parts of a wave under timed conditions.
Real‑World Applications of Wave Labels
Understanding wave labels is not just academic – it underpins many technologies:
- Communications: Antenna design relies on wavelength and frequency to match the desired radio band.
- Medical Imaging: Ultrasound uses the amplitude and wavelength of sound waves to create images of internal organs.
- Ocean Engineering: Knowing crest height and wavelength helps predict wave forces on offshore structures.
- Music Production: Audio engineers adjust amplitude (volume) and frequency (pitch) to shape sound.
Quick Recap – The Essential Labels
When you need a fast reference, remember the four core labels and their definitions:
- Crest – highest point of a transverse wave.
- Trough – lowest point of a transverse wave.
- Amplitude (A) – maximum displacement from equilibrium.
- Wavelength (λ) – distance between two consecutive points in phase.
Adding frequency (f), period (T) and the equilibrium line completes the picture and lets you calculate wave speed with v = f λ.
Final Thoughts
Labeling the parts of a wave is a skill that bridges theory and practice. By mastering the four primary labels – crest, trough, amplitude and wavelength – and understanding how they relate to frequency, period and energy transfer, you’ll be well‑prepared for GCSE physics exams and for interpreting the wave phenomena that shape our world. Keep practising with diagrams, use the quick‑label routine, and you’ll find that identifying wave features becomes second nature.